Thanks for peeking in here! Teaching is not my forte’, but I hope you enjoy this attempt to show you a bit of the watercolor process.
To begin, I placed this painting on a board at about a 45° angle. I taped it down, and then started drawing. Below is a sketch of the two hens I drew on the paper. Normally, I draw with a very light pencil so the lines can’t be seen through the paint. Here I’ve darkened them (in Photoshop) so you can at least see them… the bottom of the drawing got so dark, I had to eliminate it…

- First Sketch of Two Hens
Next, I laid in the shapes, the lights and the darks. I decided to use black India ink in some areas as it’s more intense than watercolor and has it’s own interesting properties. I put ink on the tails and around the feet of the two hens. Water dropped on the ink causes it to fan out and makes an interesting effect as on the dark hen’s tail tip.
 Laying in the Colors and shapes
I continued to layer the colors going from light to dark (with oil paint, you generally go from dark to light), testing the colors on the paper next to the painting, finding the color I need. You can see on the feathers of the orange hen the layers of color, especially on the closeup of the finished hen.
 Chickens – Third Step
 Closeup of Orange Hen
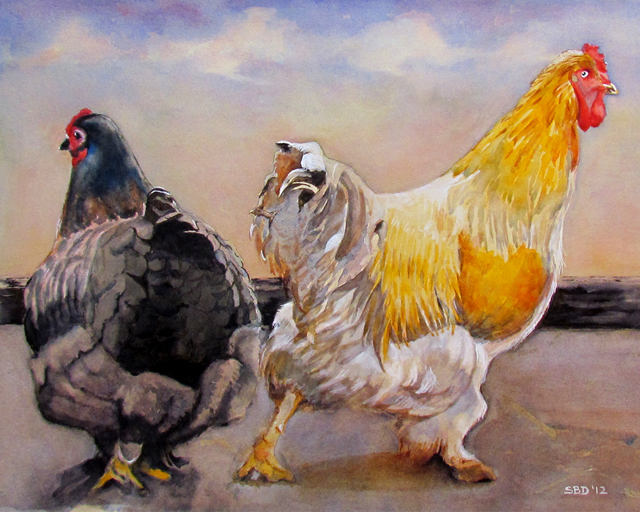
The painting is almost finished except for defining the beaks, and laying in the sky and clouds. This is hard to show as it happens so fast (maybe I’ll do a video some time as the process is really fascinating, I think). First, I carefully wet the background around the hens down to the rails (saturate might be a better word). Next, I mixed a large amount of Cobalt Blue paint with a little Quinacridone Coral. Then I lay the paint across the paper, starting at the top.
Because of the angle of the board, the paint descended – fast! I kept laying in the original color as it descended down the page. As I got closer to the girls’ heads, I started dropping in a pink/coral color and some Quinacridone Gold. You literally do drop the colors in and they fan out and blend, creating a beautiful look which is unique to watercolor. It’s beautiful!
There are several techniques for creating clouds. The one I use most often is to take some paper towel (Viva) and lift the paint while the paper is still quite wet. You can also lift with a paint brush, or wait until the paint dries and lift with a small scrub brush. Watercolor paper is extremely durable, and you can scrub and lift. Even Magic Eraser ( like you use on your kitchen floors) works great!
 Adding the Sky
Here is the finished painting – sky, beaks and all.